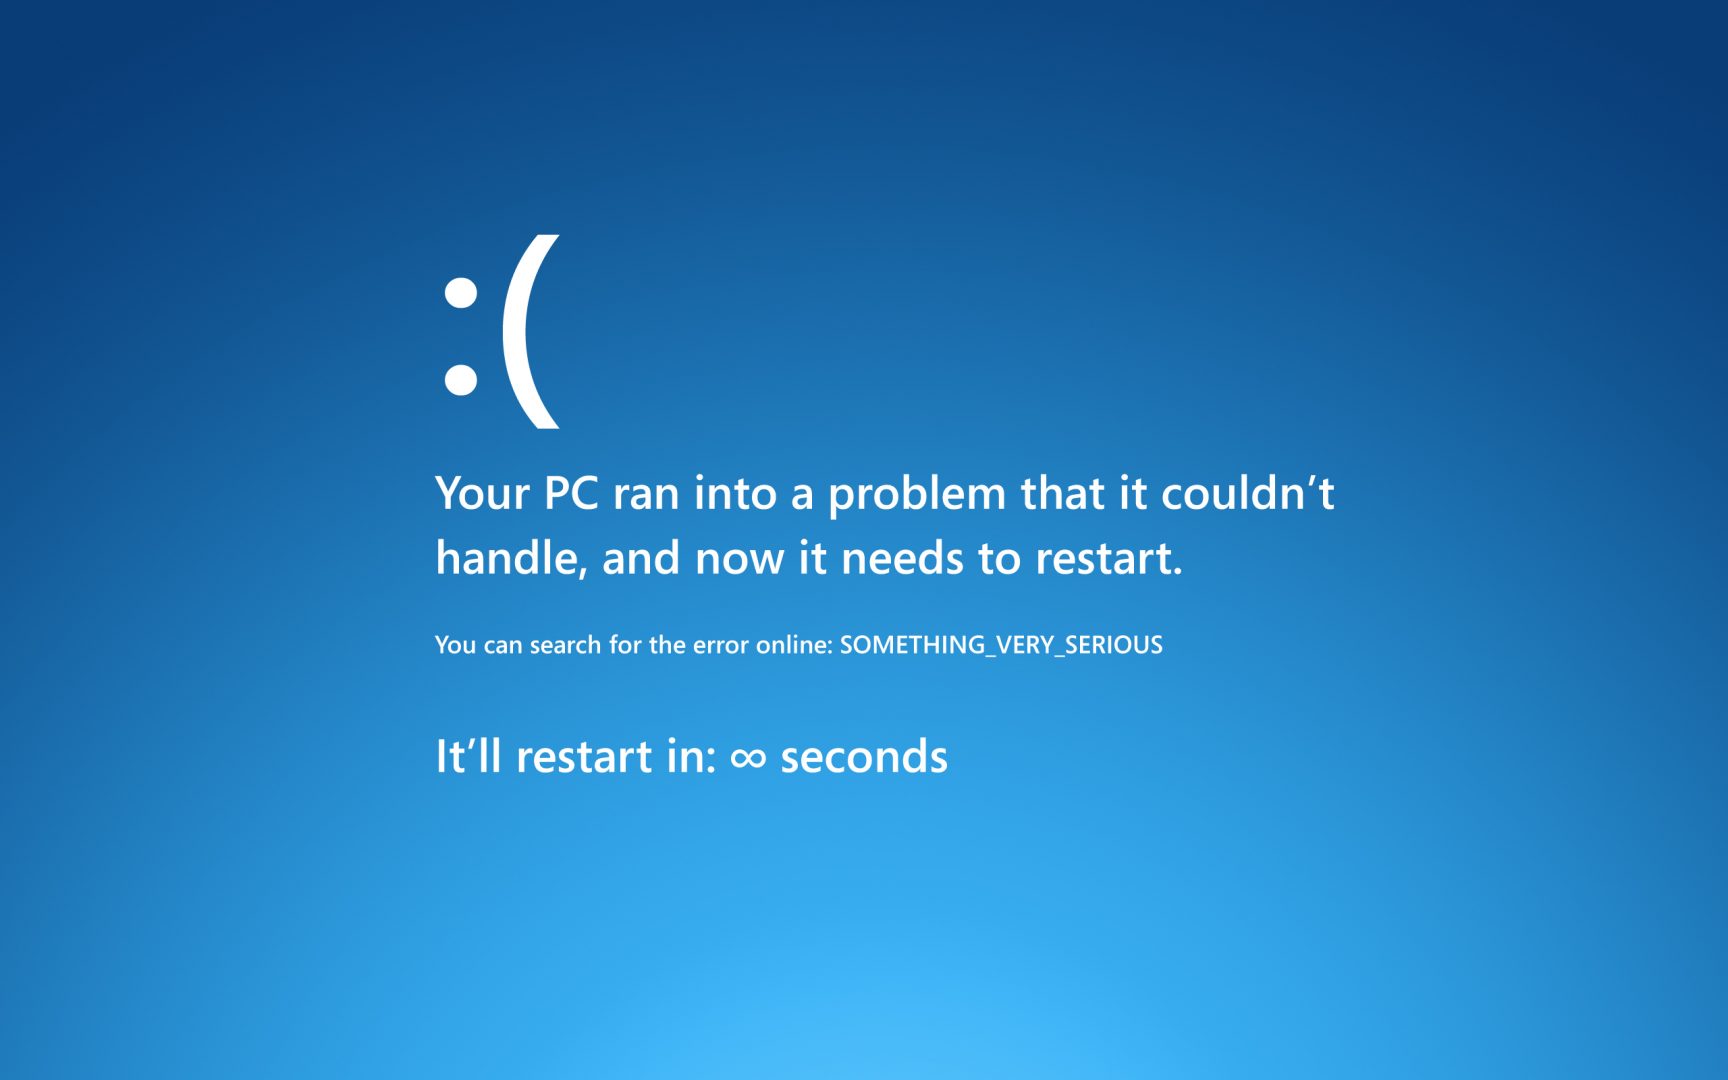
[button color=”brown” size=”normal” alignment=”none” rel=”follow” openin=”samewindow” ]What is error 0xc000021a ?[/button]
[button color=”green” size=”normal” alignment=”none” rel=”follow” openin=”samewindow” ]What triggers error 0xc000021a ?[/button]
Updating the windows triggers error 0xc000021a, so after updating only you encounter the blue screen displaying the error. Generally error is two files on our system are source of the error :
- Winlogon.exe – It handles logout and login task in our operating system. It can create problem because of Third Party Softwares or due to Mismatch of System files causing this error and making our system to boot to login window.
- Csrss.exe – It is responsible for Microsoft server or client issues, thus any damage to this file will also put you in the same situation.
[button color=”red” size=”normal” alignment=”none” rel=”follow” openin=”samewindow” ]How to Fix Error 0xc000021a ?[/button]
Step 1 :
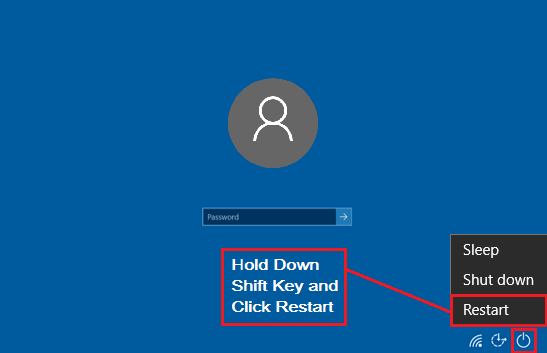
Step 2 :
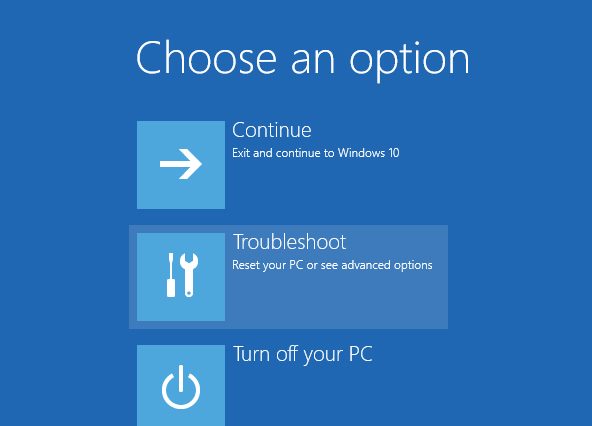
Step 3 :
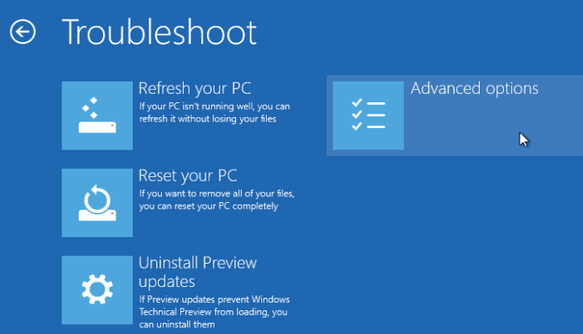
Step 4 :
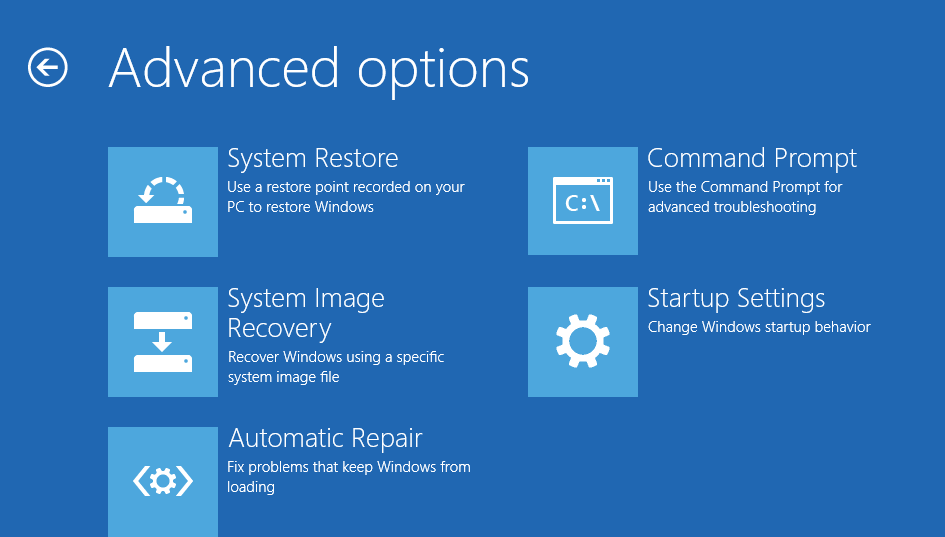
Step 5 :
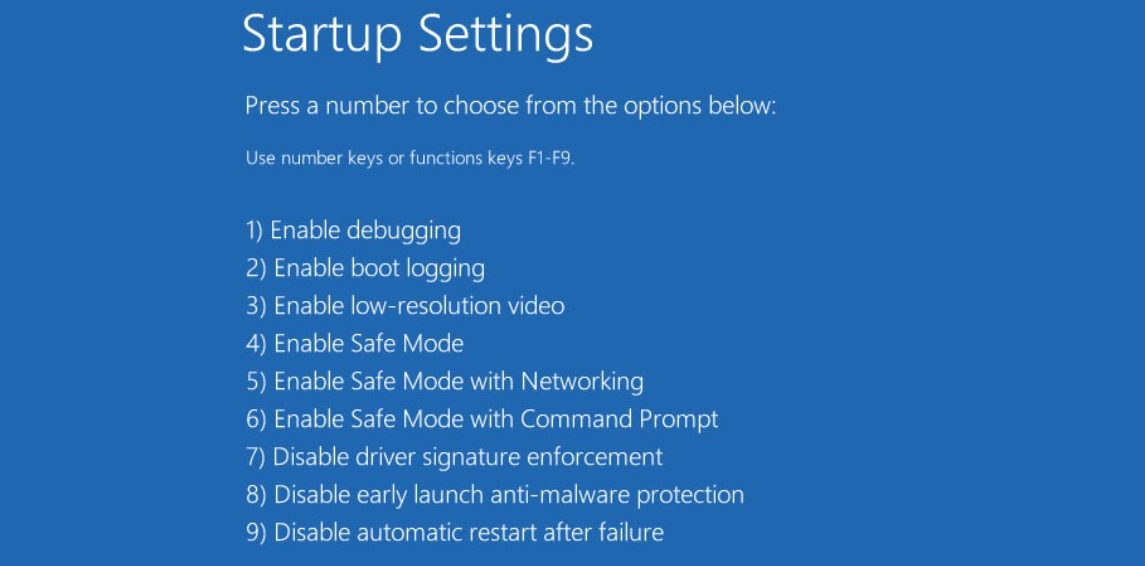
Solution 2 : Resetting the PC’s BIOS (Only for PC, Not for Laptops)
- Shut Down the system.
- Remove all the cable cords, and cut off power supply to computer (For Safety Purposes).
- Open the CPU’s chassis carefully.
- Check the motherboard and detach the CMOS Battery which will there on the motherboard.
- Keep it that way for couple of minutes.
- Attach the battery and follow the reverse process to set computer as it was before we started the process.
- Switch ON the system.
Solution 3 : Replace corrupted Registry hive files with backup files
- Insert bootable Windows DVD or USB drive into your PC and restart.
- Get into BIOS settings as the system starts booting up and be careful to configure boot order from the bootable Windows DVD or USB drive (not from HDD/SSD).
- Method for accessing BIOS settings will be different for each computer, and instructions can be seen at the first screen you see when your system starts booting up.
- Save and Exit from the BIOS.
- You will asked to press any key is you wish to boot from bootable Windows DVD or USB drive.
- Choose your language and time zone as per your convenience.
- A window will appear with an Install now button at the exact center, and if you look in bottom left corner of the window, Repair your computer button will be there, click on it.
Now, we have successfully reached Startup Options window, you need to follow these steps :
- Follow the path Troubleshoot > Advanced options > Command Prompt, and Prompt will be launched.
- If windows is installed in your C drive then type c: in the command prompt and press enter.
- Type the path cd windows\system32\config and press Enter.
- Now we get a list of all the files and folders with dir command, just type dir in command prompt and press enter.
- We have to rename each file in the directory by typing the ren (File Name) (File Name).old command and press enter. We rename each file for creating a backup for all the files.
- Now, type cd RegBack and press Enter.
- Type dir again followed by pressing Enter, you can see all of the files and folder in the directory.
- Type the command, cp (File Name) and press Enter, follow the procedure for each and every file present. Doing this will replace all the damaged and corrupted files with new one by shifting all the registry hive files previously stored in RegBack folder to config folder.
- Close the Command Prompt.
- Get out of the Windows Recovery Environment.
- Remove the bootable Windows DVD or USB drive and reboot the system.
Now you can just see for yourself that problem still persists or error hex code 0xc000021a has been resolved.

