Windows 10 comes up with many recovery options and one of them is restore point. Using this feature you can restore your system back to working condition.( if anything goes wrong with any app or drives )
Microsoft has by default disabled system restore, might be because of disk space issues but if you want to re-enable this feature just follow this simple steps and job will be done.
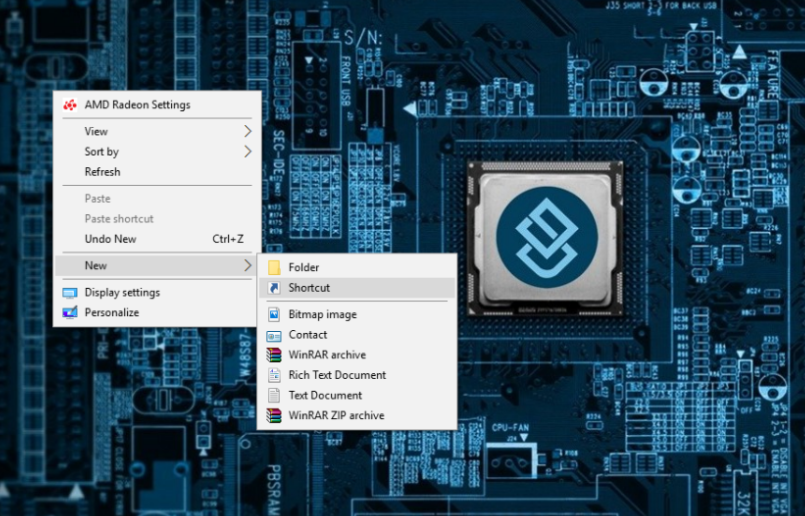
Right click on desktop –> select new and now click on shortcut
Now past this commend on create shortcut wizard
cmd.exe /k "wmic.exe /Namespace:\\root\default Path SystemRestore Call CreateRestorePoint "My Shortcut Restore Point", 100, 7" and simply click next
Name your shortcut
You can also name your shortcut as we have done it here [highlight ]Restore Point[/highlight]
Now we have created a system restore point but the job is yet not over, there are following tweaks that you should do after creating shortcut.
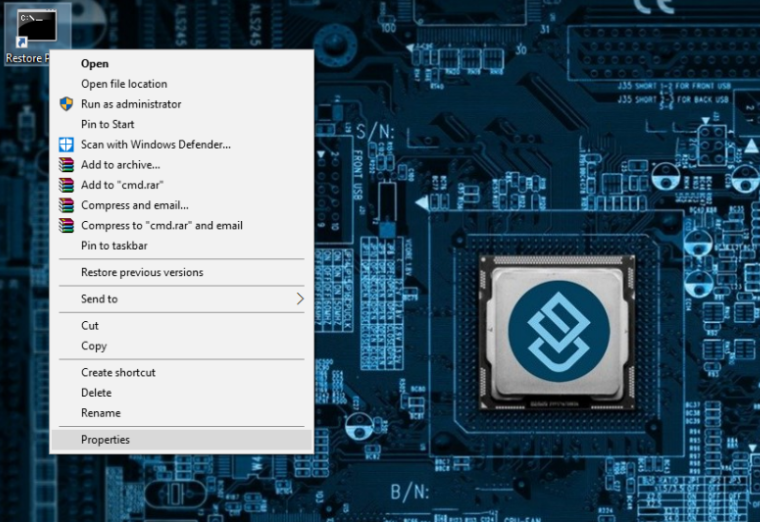
Now right click on shortcut and select properties
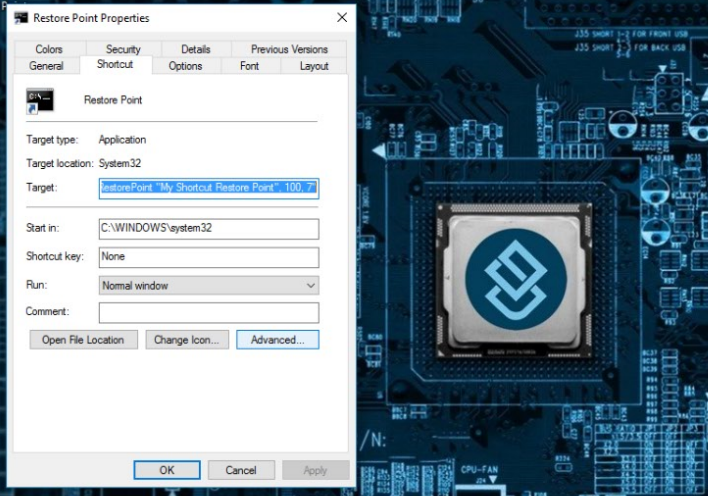
Change icon
Yes, you can also Change the icon of your shortcut if you really feel like doing it. It is quite simple, just click on shortcut tab and click on Change icon. From there you can choose which ever icon you like.
Now click on advance and select Run as administrator
Now execute the changes by clicking on APPLY and then taking cursor to OK button.
That was all to be done, now we are good to go and all you need to do is simply double click on the shortcut that you just created and it will create a restore point for you.
[alert type=red ]Let us know if you face any problem while creating this restore shortcut[/alert]
Keep visting Gawking Geeks for more tips and tricks.


